How to Control Camera Angles in ComfyUI (SDXL Workflow)
notalice
2025-12-15
In this guide I will share a ComfyUI workflow which generates different camera angles, so you can test different models, and different words.
This will be practical, and without taking much of your time, you'll learn through visual and actionable examples.
This is an essential part of image generation, asking yourself "where the camera is?" and being able to position it where you idealized will make your generations much more interesting.
How the camera angle is controlled in ComfyUI?
There are many ways to control the camera angle:
- Good prompting, words that directly mention the camera position. For example
from aboveorside view - Words that indirectly infer the camera position. Like
back,eyes,belly button - ControlNets: Instructing an image to be generated in a specific ways
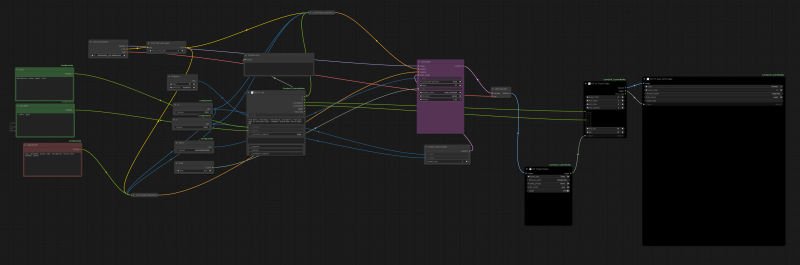
Camera Angle Workflow
You can download this workflow and add it to your ComfyUI workflow list.
When testing a new checkpoint, you can run this workflow to see how it respects different camera angle keywords.
Requirements to run the workflow:
- Install missing nodes
- Make sure you have ComfyUI_Comfyroll_CustomNodes installed
- cd into
ComfyUI/custom_nodes/ComfyUI_Comfyroll_CustomNodes - Type
git remote add claudiaj https://github.com/ClaudiaJ/ComfyUI_Comfyroll_CustomNodes.git - Type
git fetch claudiaj fix/xygrid-font-path - Now merge it using
git merge claudiaj/fix/xygrid-font-path
Node: this is needed because a PR haven't been merged in some time, once it's merged, just update the node ComfyUI_Comfyroll.
After that, this is how to use the workflow:
-
Disable "trigger" from CR Image Output Note: You can add or remove the list of camera angles if you want, at the CR XY List node, we have 11 camera angles there
-
Make sure the output folder of CR Image Output exists, otherwise add the empty folder
ComfyUI/output/cr -
For the index parameter of CR XY List, there is a Primitive node with its current value, reset it to 1
-
On CR XY From Folder set end index to the quantity of camera angles, like 11
-
Run a batch with 10 images (or whatever the quantity of your camera angles is, subtracted of 1)
-
Now run again but this time enable Trigger on the CR Image Output Node
This will generate all camera angles at the cr folder! You can browse them through your file browser.
And at the almost last image, you enable trigger, that will call the plotting node to show the graph. This part is a bit strange currently so don't rely on it much until I find a better plotting node library.
The different camera perspectives in SDXL
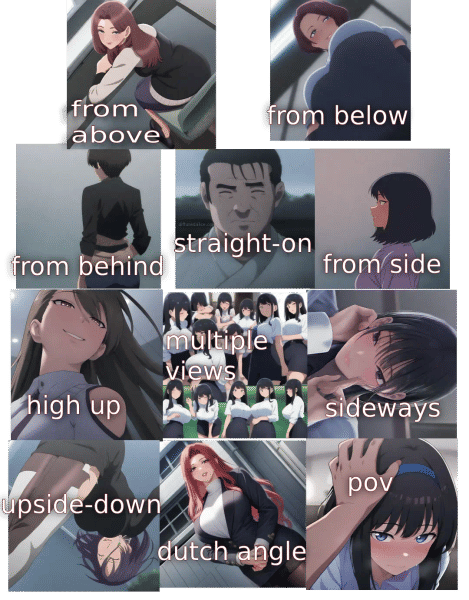
The image above shows many different camera angles. This is an output image of the workflow above if you are wondering.
As you can notice, Illustrious respects these angles pretty well. But if you try using bird's-eye view or worm's-eye view you might encounter some issues.
Illustrious and various other SDXL checkpoints will use booru-like tagging, which means it answers better to these prompts:
from above: camera is above the subjectfrom below: camera is below the subjectfrom behind: camera is behind the subject, if the subject is a person, you'd look at their back- /straight-on/: face-level with your subject, if the subject is a person then they will be most likely staring at the camera
from side: looking at the side of your object, you can be more precise withprofile viewas wellhigh up: this is a bit related to composition, it will make your subject be at a high place, the camera will suggest depthmultiple views: will show more than a view of your subject, different angles, etcsideways: camera will be tilted 90 degrees, honestly I'd recommend you to not use this, instead just flip the image the way you want on an image editing software- /upside-down/: same as sideways but from top to bottom, although it gives more interesting results
dutch angle: tilt the camera a bit on its axis, it's used in movies to make the viewer uncomfortablepov: you are the camera, often will have hands coming from the camera perspective
These are prompts which are very easy for the checkpoint to understand, but that doesn't mean that's all you can do with stable diffusion.
Camera angle and composition cannot fight
To properly generate images in interesting angles, you need to learn to distinguish something: what is a camera angle, and what belongs to composition?
I will use a practical example to help you understand this.
Let's say I want to generate a character in one of these camera angles, where the camera is above my character as they walk, this is a crazy angle, and you should know exatly the one I am talking about.
Well how do we do it? These damn tutorials just teach us to type from above and call it a day!
Well let's try that.

It didn't work, why is she on the floor? We didn't prompt that.
Ok, maybe the AI needs to know more about where I want the camera to be?
Let's try from above extreme angle camera above character.

Now, understanding what happened here is the clue for getting custom camera angles right.
Let's remember what I wanted origininally, quoting myself: "where the camera is above my character as they are going somewhere".
We already said that the camera is above, when we prompted from above so why are we prompting more camera stuff?
Let's think differently, we prompted the camera angle, now we should prompt the composition of our generation.
There are many different ways to solve this, and one of them is adding the prompt full body
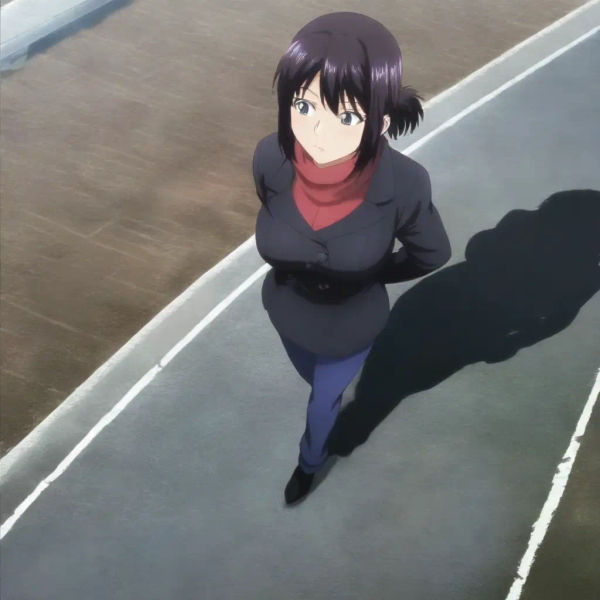
Awesome! By giving some composition prompts to the AI instead of just camera, it figured out the camera angle/pose I was thinking about.
This is why there are words that infer the camera position, by using minimal camera angle prompts, and good composition prompts, the AI will place the camera where you expect it to be.
If you want an exercise, try generating a character playing tennis, with a view from below instead of from above like this. How many camera angle prompts will you need? How many composition prompts?
You can get more specific with Loras and ControlNets
There is a lot with camera angles using just prompts, but I understand that sometimes you want exact control over the camera angle.
For that you may want to look-up Loras for your base model that have a camera angle you like.
Or you can also use an open pose controlnet, or a depth control net which will instruct the AI into using the angle of your reference image.
These are more advanced concepts, and you should focus on prompting for camera angles, although I will be writing specific guides on LORAs and ControlNets.
LORA: An "add-on" for your checkpoint, which will give it some hints on how to do specific stuff well, example: some crazy specific angle ControlNet: An instructor which keeps yelling at your checkpoint: the generation will have this exact depth! or maybe 50% of this depth, or maybe it will follow a sketch, etc.
The camera is still not where I want!
Here are some practical steps to fix your prompt:
- Read all your prompt, write down words that belong to composition. For example: a body part, part of the scenario, an action, number of character, etc
- Write down words that are camera angle-related, like from above, from below, side view, etc
- Cleanup composition words that should not show from that camera view. For example if I have a
from abovetag, then I should most likely not have asolestag. Or a more common example: If I have afrom behindtag, I should avoidlooking at viewer(unless I want the character looking back). - Cleanup repetitive camera angle tags, keep the strongest one
That's it!
Words that infer the camera angle are probably the reason behind your camera angle woes!
Conclusion
I hope this article was helpful for newcomers and also veterans on stable diffusion. If you are doing things different and it also works, then do not worry, find the approach that works better for you!
If you learned something from here, maybe check-out my free guide also available here: Stable Diffusion for Dummies: Free Ebook
No tricks, it's all on this website, keep on learning and generating!